Everything is now working perfectly, apart from the mains power connector sticking out of a PCI bracket. For now this will do, it is better than cutting a hole in the back of the case that I later no longer want.
Some observations I have made are that it is quite top heavy at the moment- if I had more time I may consider creating a mount in the bottom of the case to place the hard drives in and also the airflow isn’t particularly that great. I have no intake fan at the front and so the hard drives are running slightly warmer than they should do. The mesh look of the case also means dust can quite easily enter and settle inside the case. I’ve been researching ways to stop this while not reducing air flow and a recommended solution is to use a stretched pair of tights.
Monday, 6 February 2012
Sunday, 5 February 2012
Mac Build 2011- Day 13- Adding Power Extension
The ETX extension arrived and I could tuck it neatly underneath the motherboard tray. The only thing I was missing now as a way of turning it on, seeing as the front panel connectors weren’t connected.
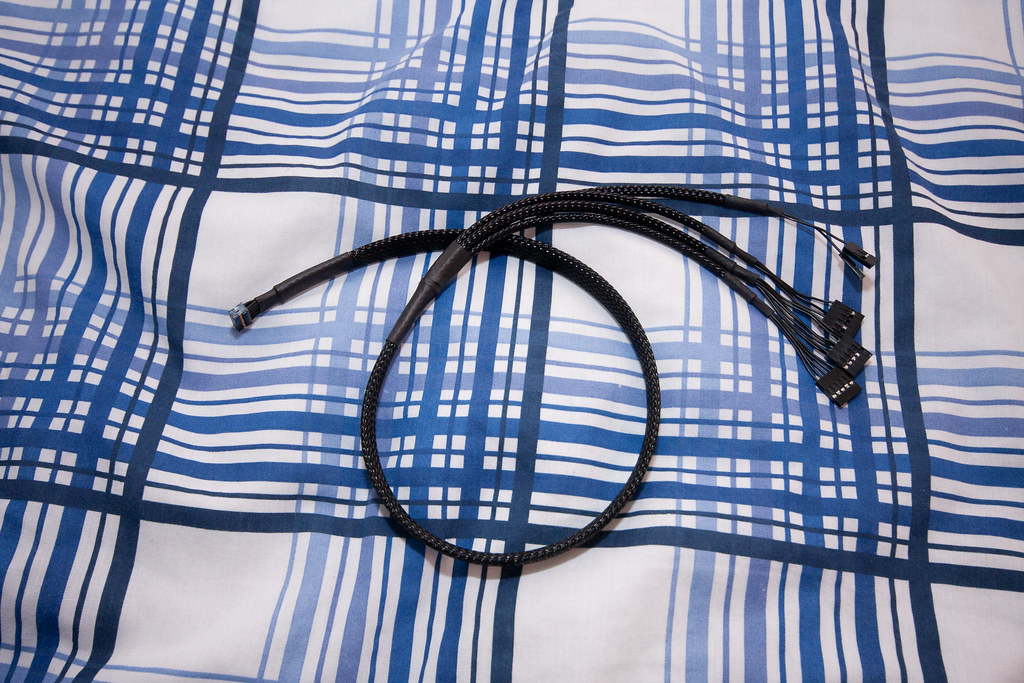
The PowerMac front connector used 1 cable with 18 pins that plugged into the mac motherboard to power the firewire, audio, USB, power button and LED connectors. This was no good for ATX, so I came across this thread (http://www.insanelymac.com/forum/index.php?showtopic=222735) where a guy in Spain hand made the cables suitable for ATX motherboards.
At €30 it seemed quite expensive and I was slightly dubious sending this amount of money to someone on a forum in another country, but when it the cable arrived I was impressed. It was braided beautifully and worked perfectly.
Saturday, 4 February 2012
Mac Build 2011- Day 12- Adding Components
The case was ready to add my components. While the case was empty, I fed the modular power supply cables up to the top shelf and into the power supply. I then added the motherboard (with the CPU, heatsink and RAM already attacked) followed by the optical drive.
It did turn out to be a bit of a squeeze fitting the optical drive in, but as long as it’s an 18cm deep drive you’ll be fine. I then discovered my 4/8 pin ETX power connector wasn’t long enough, now the motherboard was mounted upside down. A quick trip to eBay and I found a 30cm extension for £3 with next day delivery.
All I had left to add was the graphics card and the hard drives. I reckon a 30cm graphics card should just about fit in the case before hitting the hard drive cages.
Friday, 3 February 2012
Mac Build 2011- Day 11- Mounting the Hard Drives & PSU Plug
The case came with a 2 bay hard drive cage using screws with rubber heads to hold the hard drives into the rails. While this seems a great idea to reduce vibrations, normal screws won’t fit in the rails particularly well and finding suitable screws took a while. If you want to get originals, they go for around £8 for a pack 4 on eBay (i.e £8 per hard drive). Since I have an SSD and 3x 3.5” drives, I needed to get another identical cage or find something else. I could also have made my own bracket to mount the hard drives in the bottom of the case to lower the centre of gravity, but in the end I bought another Apple cage for £15 on eBay.
The plan was to fix the 2 cages together and then mount them in the case. The cages have 4 plastic lumps on each side which held then in place originally, but now these were in the way and so were removed with a Stanley knife. I drilled 3 holes in each side and fitted small nut and bolts and the 2 cages now sat flush together.
I then drilled 2 larger holes in each side and these would be used to mount the cages to the top shelf under the optical drive. The main choice when drilling is whether you want the rotating locks that hold the hard drives in to be on the left side (front of the case) or right side. I chose on the left, to give slightly more space for large graphics card if needs be. The only downside to this is that the hard drives are mounted upside down.
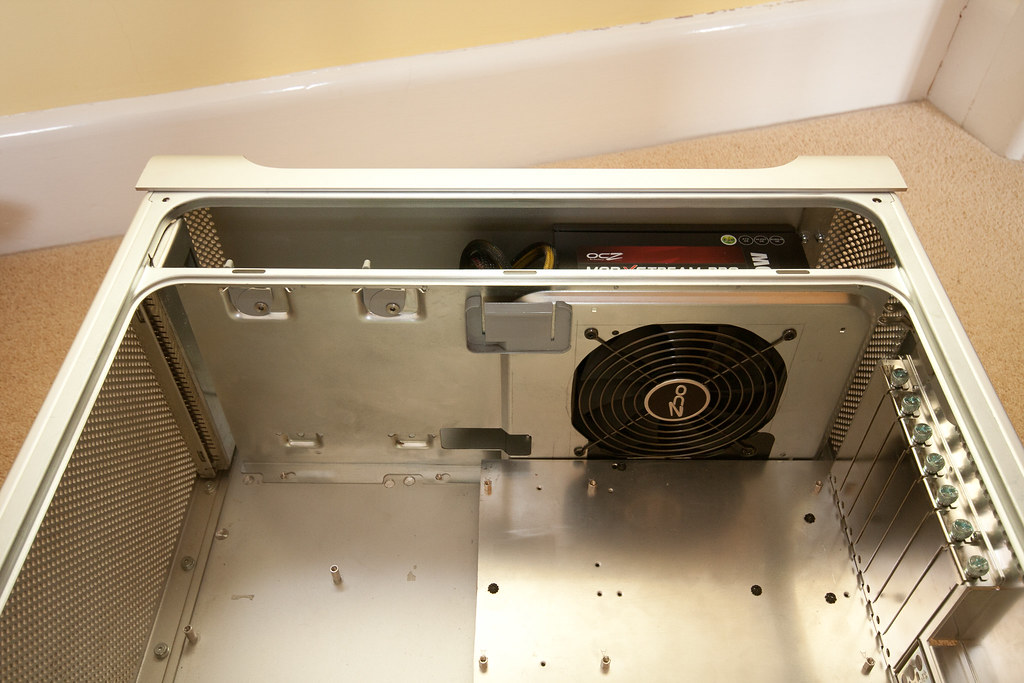
For now, I didn’t have the time to find a way to mount the power supply connector in the back of the case. I bought a right angled kettle plug and stripped the end off an old kettle lead. I fed the wire through an unused PCI bracket and up through the top shelf and soldered on the plug. While not ideal, it does keep the back of the case intact for now.
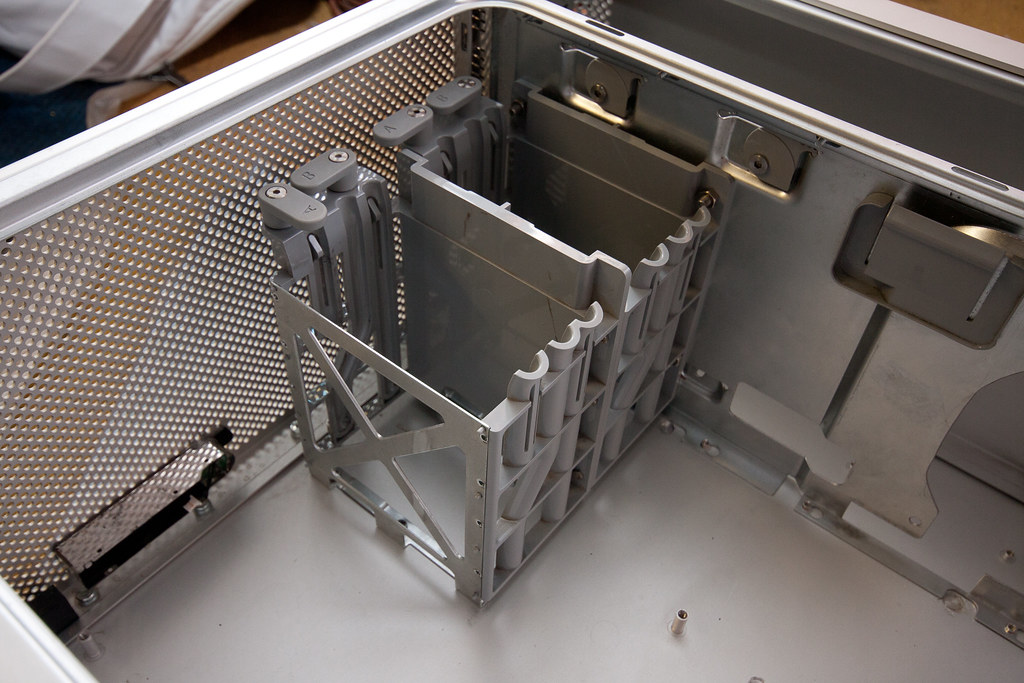
The plan was to fix the 2 cages together and then mount them in the case. The cages have 4 plastic lumps on each side which held then in place originally, but now these were in the way and so were removed with a Stanley knife. I drilled 3 holes in each side and fitted small nut and bolts and the 2 cages now sat flush together.
I then drilled 2 larger holes in each side and these would be used to mount the cages to the top shelf under the optical drive. The main choice when drilling is whether you want the rotating locks that hold the hard drives in to be on the left side (front of the case) or right side. I chose on the left, to give slightly more space for large graphics card if needs be. The only downside to this is that the hard drives are mounted upside down.
For now, I didn’t have the time to find a way to mount the power supply connector in the back of the case. I bought a right angled kettle plug and stripped the end off an old kettle lead. I fed the wire through an unused PCI bracket and up through the top shelf and soldered on the plug. While not ideal, it does keep the back of the case intact for now.
Thursday, 2 February 2012
Mac Build 2011- Day 10- Mounting the PSU
With the PSU in place on the top shelf, I drew around it in pencil. I then removed the fan cover and from this I could work out where I needed to cut a hole in the top shelf for the fan to poke through. Unfortunately one of the four screw holes doesn’t pass through the top shelf as there was already a hole there from existing cables to pass through. But with the other 3 in place the power supply has a tight fit. There are barely a couple of millimetres between the power supply and the top of the case.
Wednesday, 1 February 2012
Mac Build 2011- Day 9- PSU Location and Connector
Now that I had decide to mount the power supply in the top, the next decision was how far forward or back I should mount it. The issues here were the space required between the back of the optical drive and modular cables from the power supply, and space between the power supply and the back of the case. At first thought, it would seem mounting it at the back of the case would be best, however the corner of the case curves so there’s nearly a 5cm gap between the power supply and the back of the case.
This would also leave space to for the power supply plug. I wanted to keep the case as clean as possible on the outside, so I plan to use the original power supply cable and connector.
This would also leave space to for the power supply plug. I wanted to keep the case as clean as possible on the outside, so I plan to use the original power supply cable and connector.
Subscribe to:
Posts (Atom)