Everything is now working perfectly, apart from the mains power connector sticking out of a PCI bracket. For now this will do, it is better than cutting a hole in the back of the case that I later no longer want.
Some observations I have made are that it is quite top heavy at the moment- if I had more time I may consider creating a mount in the bottom of the case to place the hard drives in and also the airflow isn’t particularly that great. I have no intake fan at the front and so the hard drives are running slightly warmer than they should do. The mesh look of the case also means dust can quite easily enter and settle inside the case. I’ve been researching ways to stop this while not reducing air flow and a recommended solution is to use a stretched pair of tights.
Monday, 6 February 2012
Sunday, 5 February 2012
Mac Build 2011- Day 13- Adding Power Extension
The ETX extension arrived and I could tuck it neatly underneath the motherboard tray. The only thing I was missing now as a way of turning it on, seeing as the front panel connectors weren’t connected.
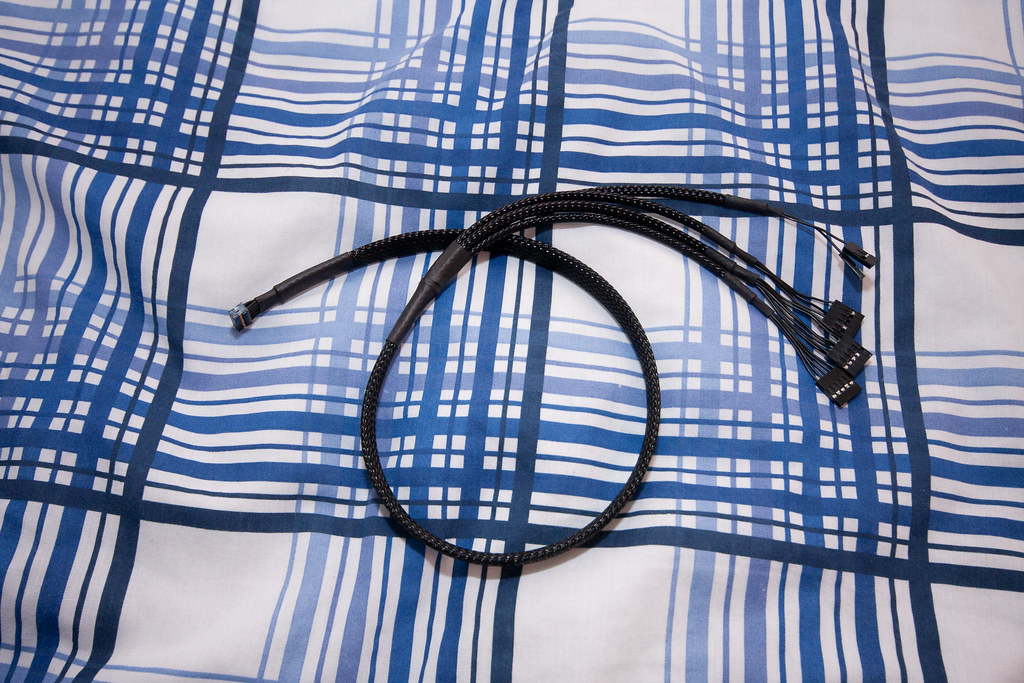
The PowerMac front connector used 1 cable with 18 pins that plugged into the mac motherboard to power the firewire, audio, USB, power button and LED connectors. This was no good for ATX, so I came across this thread (http://www.insanelymac.com/forum/index.php?showtopic=222735) where a guy in Spain hand made the cables suitable for ATX motherboards.
At €30 it seemed quite expensive and I was slightly dubious sending this amount of money to someone on a forum in another country, but when it the cable arrived I was impressed. It was braided beautifully and worked perfectly.
Saturday, 4 February 2012
Mac Build 2011- Day 12- Adding Components
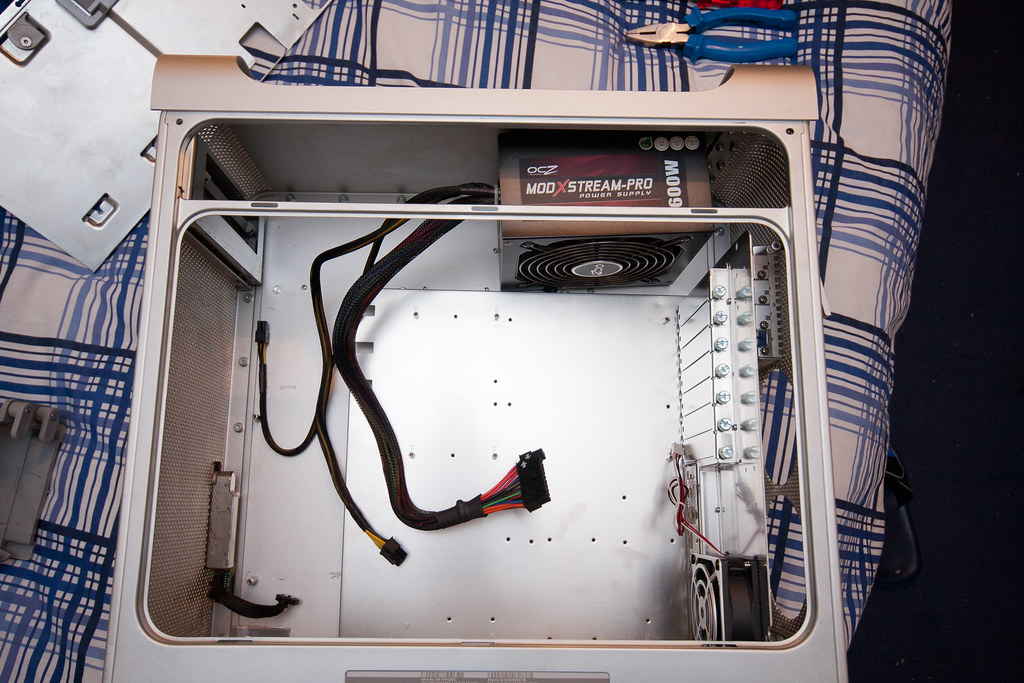
The case was ready to add my components. While the case was empty, I fed the modular power supply cables up to the top shelf and into the power supply. I then added the motherboard (with the CPU, heatsink and RAM already attacked) followed by the optical drive.
It did turn out to be a bit of a squeeze fitting the optical drive in, but as long as it’s an 18cm deep drive you’ll be fine. I then discovered my 4/8 pin ETX power connector wasn’t long enough, now the motherboard was mounted upside down. A quick trip to eBay and I found a 30cm extension for £3 with next day delivery.
All I had left to add was the graphics card and the hard drives. I reckon a 30cm graphics card should just about fit in the case before hitting the hard drive cages.
Friday, 3 February 2012
Mac Build 2011- Day 11- Mounting the Hard Drives & PSU Plug
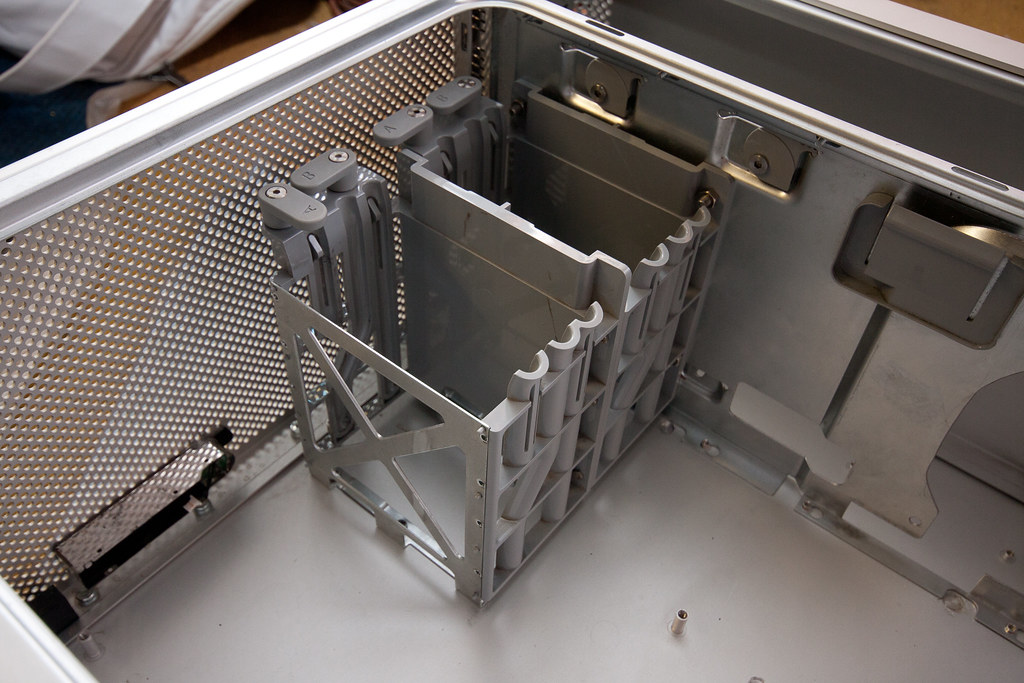
The case came with a 2 bay hard drive cage using screws with rubber heads to hold the hard drives into the rails. While this seems a great idea to reduce vibrations, normal screws won’t fit in the rails particularly well and finding suitable screws took a while. If you want to get originals, they go for around £8 for a pack 4 on eBay (i.e £8 per hard drive). Since I have an SSD and 3x 3.5” drives, I needed to get another identical cage or find something else. I could also have made my own bracket to mount the hard drives in the bottom of the case to lower the centre of gravity, but in the end I bought another Apple cage for £15 on eBay.
The plan was to fix the 2 cages together and then mount them in the case. The cages have 4 plastic lumps on each side which held then in place originally, but now these were in the way and so were removed with a Stanley knife. I drilled 3 holes in each side and fitted small nut and bolts and the 2 cages now sat flush together.
I then drilled 2 larger holes in each side and these would be used to mount the cages to the top shelf under the optical drive. The main choice when drilling is whether you want the rotating locks that hold the hard drives in to be on the left side (front of the case) or right side. I chose on the left, to give slightly more space for large graphics card if needs be. The only downside to this is that the hard drives are mounted upside down.
For now, I didn’t have the time to find a way to mount the power supply connector in the back of the case. I bought a right angled kettle plug and stripped the end off an old kettle lead. I fed the wire through an unused PCI bracket and up through the top shelf and soldered on the plug. While not ideal, it does keep the back of the case intact for now.
Thursday, 2 February 2012
Mac Build 2011- Day 10- Mounting the PSU
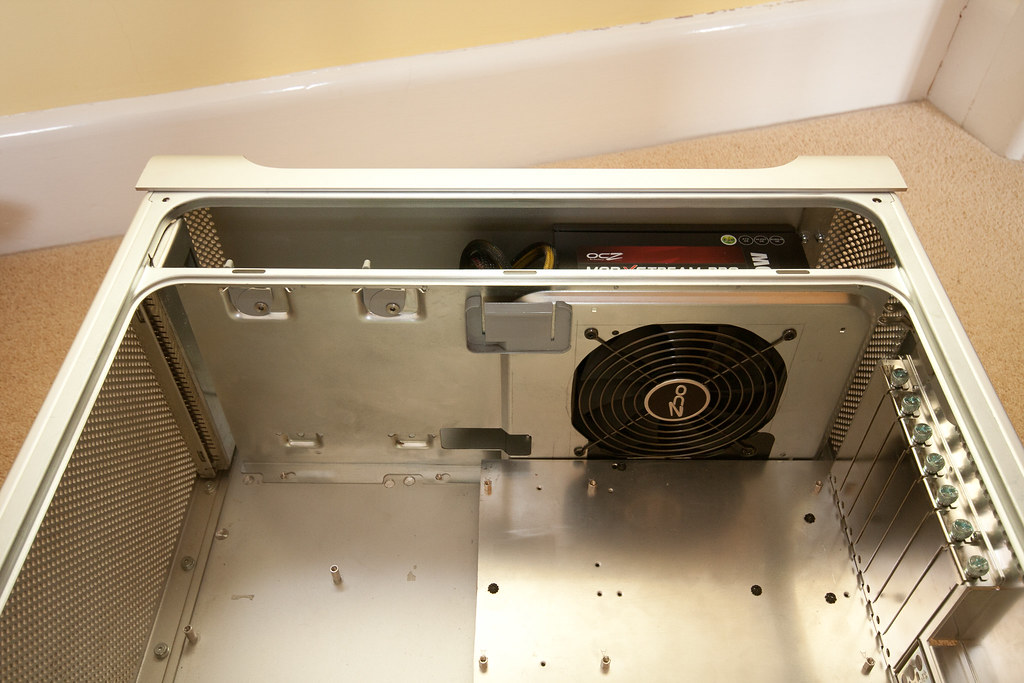
With the PSU in place on the top shelf, I drew around it in pencil. I then removed the fan cover and from this I could work out where I needed to cut a hole in the top shelf for the fan to poke through. Unfortunately one of the four screw holes doesn’t pass through the top shelf as there was already a hole there from existing cables to pass through. But with the other 3 in place the power supply has a tight fit. There are barely a couple of millimetres between the power supply and the top of the case.
Wednesday, 1 February 2012
Mac Build 2011- Day 9- PSU Location and Connector
Now that I had decide to mount the power supply in the top, the next decision was how far forward or back I should mount it. The issues here were the space required between the back of the optical drive and modular cables from the power supply, and space between the power supply and the back of the case. At first thought, it would seem mounting it at the back of the case would be best, however the corner of the case curves so there’s nearly a 5cm gap between the power supply and the back of the case.
This would also leave space to for the power supply plug. I wanted to keep the case as clean as possible on the outside, so I plan to use the original power supply cable and connector.
This would also leave space to for the power supply plug. I wanted to keep the case as clean as possible on the outside, so I plan to use the original power supply cable and connector.
Tuesday, 31 January 2012
Mac Build 2011- Day 8- Tray mount holes
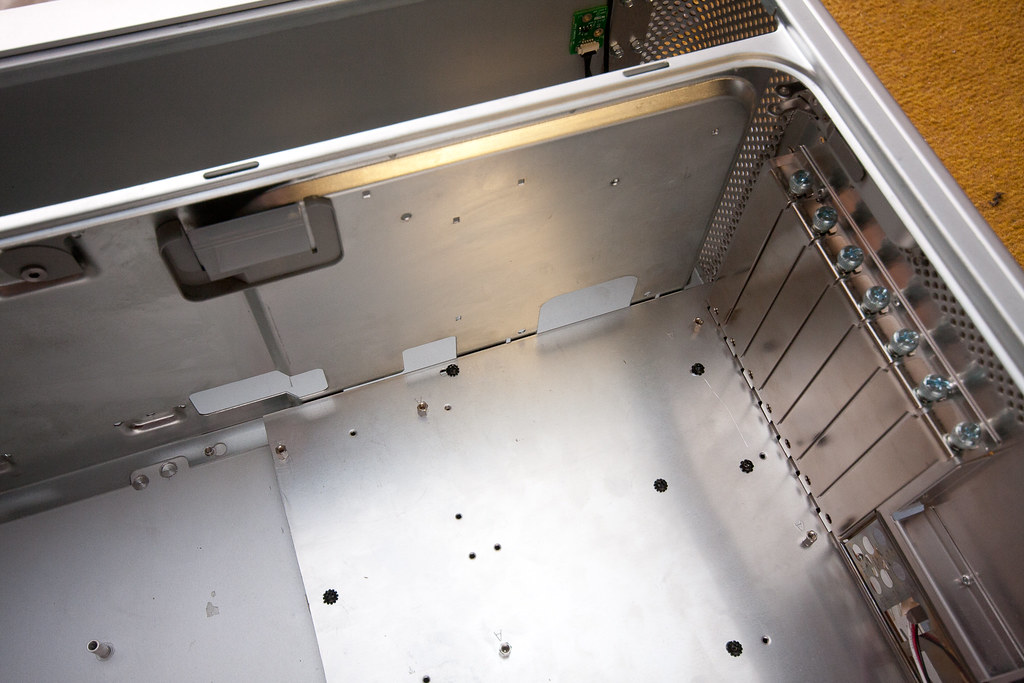
The next task was fixing the motherboard tray in place. From the guides I have seen, many people used JB Weld to fix the old mounting posts into new positions. However this is not available in the UK so I continued without it for now. Note that the motherboard mounting posts of 2 different heights for some reason. I removed all of the taller posts (by gripping them with pliers and with a little force they break away from the case) and left all the shorter ones in place.
The difficulty was working out where I needed to drill the holes through the motherboard tray to line up the mounting posts that were left. To do this I covered the back of the tray in a couple of layers of masking tape, put the tray in position and pressed down where I thought the mounting posts were. This left small rings imprinted in the surface of the tape, so I knew exactly where to drill.
This worked pretty well, only 1 post was horrendously out of position so I had to re-drill this hole. This wasn’t really a problem seeing as the tray would be hidden beneath the motherboard. I managed to use 10 of the existing mounting posts and as it turned out these were quite sturdy and so no screws were required on the back of the tray to hold it to the back of the case. This was a bonus as I really didn’t want the back of the case to look too messy.
Monday, 30 January 2012
Mac Build 2011- Day 7- Cutting the Case
Now that the power supply would be above the top shelf and out the way, I could decide where I wanted to mount the motherboard tray. Because the tray I chose was ATX, it was quite tall. So tall in fact that if I mounted it as high as it will go, it only just avoided the start of the curvature of the bottom edge of the case.
After some Photoshop work, the area that needed to be removed from the back of the case was cut and the tray slid in a treat. The corner of the tray was also cut so that the leave to open the case could be accessed. The fit was so good, the top edge of the tray was flush with the top shelf.

After some Photoshop work, the area that needed to be removed from the back of the case was cut and the tray slid in a treat. The corner of the tray was also cut so that the leave to open the case could be accessed. The fit was so good, the top edge of the tray was flush with the top shelf.
Sunday, 29 January 2012
Mac Build 2011- Day 6- Trying different motherboard and PSU positions
The biggest decision in the case mod is deciding where to mount the power supply. There were 3 possibilities I would consider.
Another issue is the size of the motherboard tray. The ATX tray I have is quite wide (from the front to the back of the case) so moving it up or down may not be that easy if it hits the optical drive for example.
In the end I decided I would mount the power supply in the top as it seemed the best use of space, leaving a large space in the case for hard drives.
At some point I got the motherboard tray cut. There were a good 5cm after the last set of holes I needed to mount it to the case and removing this area would mean I could possibly mount the motherboard tray up high in the case and not hit the optical drive. I got this cut courtesy of the main workshop in the Queen’s Building of the Faculty of Engineering.
- Mounting the PSU in the top- the issue here is if there’s enough height between the shelf and the top of the case and finding a new home for the hard drives.
- Mounting it in the bottom at the front- this would require making some kind of mount / way of attaching it to the bottom of the case since there are only 4 holes in the bottom of the case. I would also need to make a cable to reach from the power plug in the back of the case to the power supply itself.
- Removing the PSU from the case and putting it inside the Mac PSU case- this seemed to be a tidy solution, albeit the most dangerous. As soon as you open up the case of your PSU the warranty is void and so I didn’t want to do this and the find out it wouldn’t fit inside the Mac PSU case. I could then reuse the existing Mac plug connector on the back of the case.
Another issue is the size of the motherboard tray. The ATX tray I have is quite wide (from the front to the back of the case) so moving it up or down may not be that easy if it hits the optical drive for example.
In the end I decided I would mount the power supply in the top as it seemed the best use of space, leaving a large space in the case for hard drives.
At some point I got the motherboard tray cut. There were a good 5cm after the last set of holes I needed to mount it to the case and removing this area would mean I could possibly mount the motherboard tray up high in the case and not hit the optical drive. I got this cut courtesy of the main workshop in the Queen’s Building of the Faculty of Engineering.
Saturday, 28 January 2012
Mac Build 2011- Day 5- Cleaning the PSU
This was the first time I’ve had a look inside a computer PSU so didn’t really know what to expect. What I found was tonnes and tonnes of dust. On the front of the case were 2 small fans that suck air through the PSU and out the back of the case. However there isn’t a filter on the front and the fans are right at the bottom of the case, so a fair amount of dust from the floor is sucked in.
After sticking a hoover through it and removing the circuit board, and could have a guess at whether the PSU I had would fit in this case.
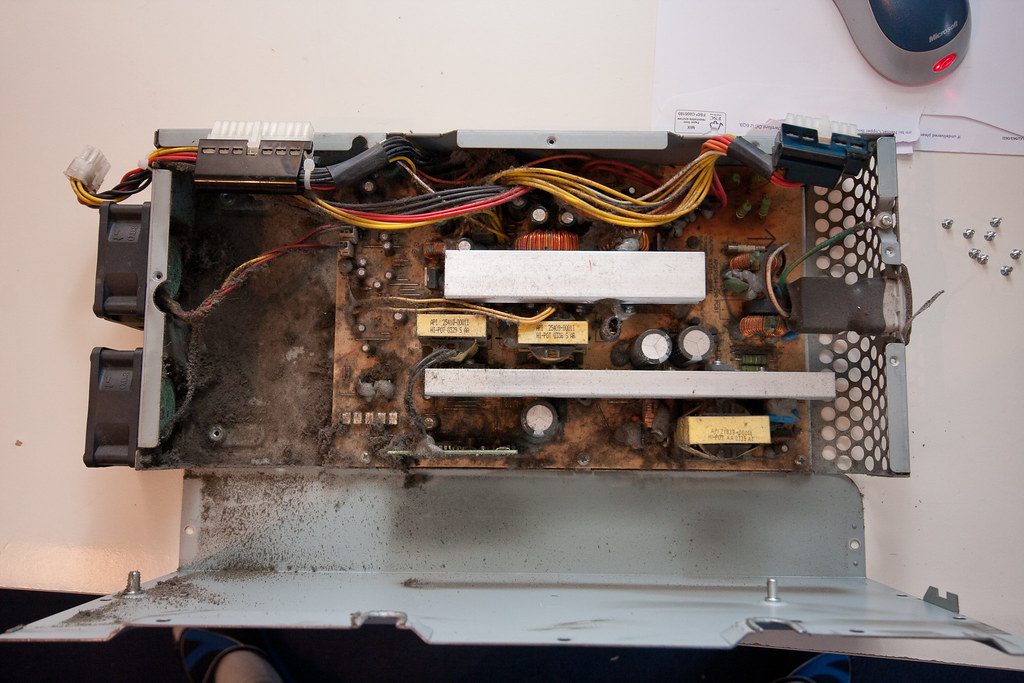
After sticking a hoover through it and removing the circuit board, and could have a guess at whether the PSU I had would fit in this case.
Friday, 27 January 2012
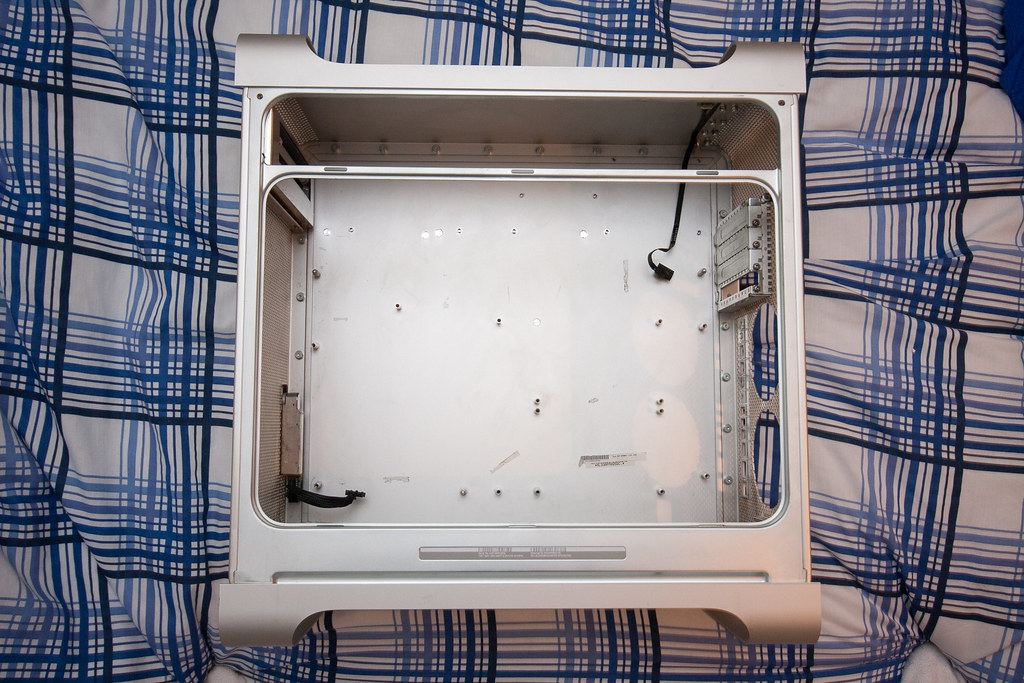
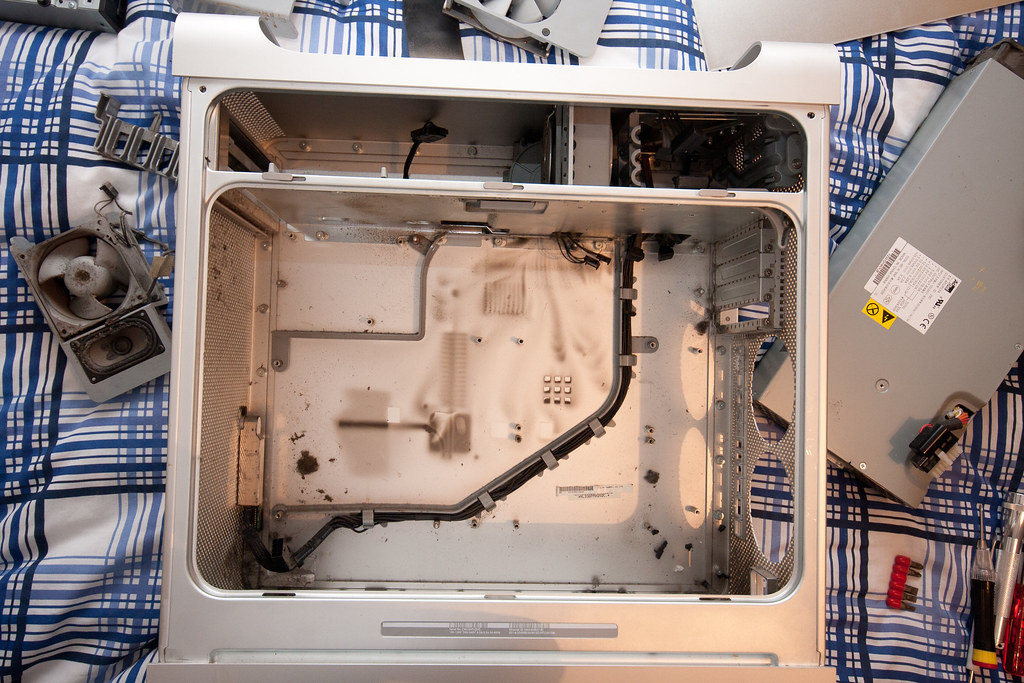
Mac Build 2011- Day 4- Cleaning the Case
There was quite a lot of dust in the case. Some of which has dried on due to the coffee spillage. After a hoover and a spray of some metal cleaner, the inside of the case was shiny again and looked new. You can now see the motherboard mounting posts which I tried to reuse.
Thursday, 26 January 2012
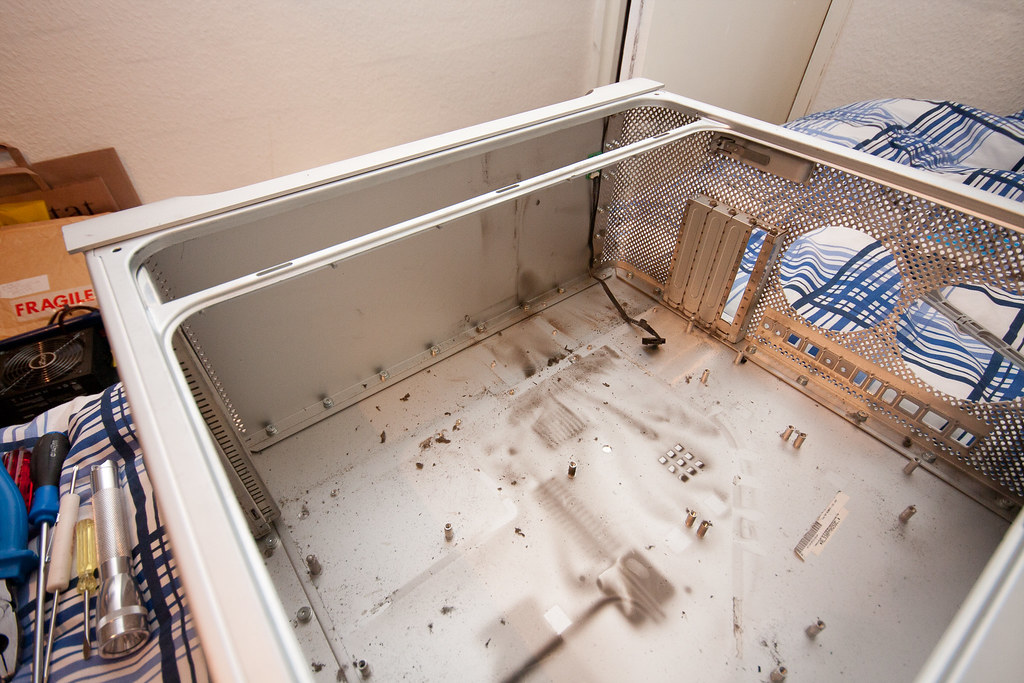
Mac Build 2011- Day 3- Stripping the Case 2
After a trip to Toolstation for a long handled screwdriver I could remove the hard drive cage and fan. However the cage was too large to slide out the side of the case, so next up was removing the top shelf that supports the hard drive cage and optical drive.
The shelf was held in neatly, however it also contained the lock for the side panel which tricky to remove and felt quite flimsy. Care had to be taken not to snap it. Once this was out the shelf rotated out and out came the hard drive cage.
All that was left to remove were the cables that were clipped down diagonally across the back of the case which were held in place with double sided tape.
Wednesday, 25 January 2012
Mac Build 2011- Day 2- Stripping the Case
The first challenge was removing all the Apple parts in the case. Some parts were held in in very weird and peculiar ways. All the screws were different for each component, which made it a pain to remove some parts. Most screw heads were Phillips, but some had Hex and Torx heads which luckily and I had the right size screw bits.
The first parts to come out were the CPU heatsink and fan. The heatsink was heavy and absolutely massive. I could now see all the screws holding the motherboard in place. There were a few cables to disconnect for the power, front IO, fans and hard drives, once these were removed the motherboard lifted out relatively easily.
I could now access the power supply in the bottom of the case. Again this was relatively easy to remove as it was only held in by a few of screws, however there are 4 to remove from the underside of the case. The Mac PSU is strange in that it covers the whole bottom of the case, but in doing so it is relatively thin.
I then hit a problem in that I couldn’t reach some screws that held the hard drive cage in place.
Tuesday, 24 January 2012
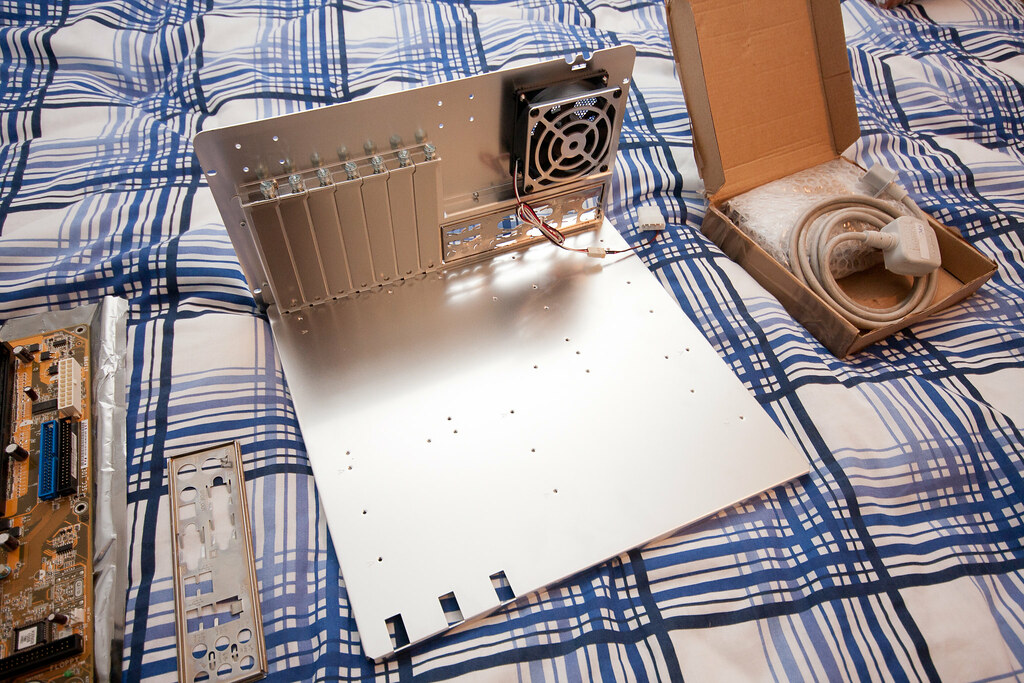
Mac Build 2011- Day 1- Motherboard Tray
The next thing I needed was a motherboard tray. A PowerMac motherboard is not ATX or any other standard you have heard of and so the screw mounts for the motherboard would be in completely the wrong places. Furthermore, the back IO ports and PCI slots were wrong as well.
Therefore a motherboard tray would be needed. The choice was ATX or mATX. Hours were spent on forums looking at other peoples builds and seeing how ATX and mATX fit inside the case with all the other parts such as power supply and hard drives in different places.
In the end I opted for ATX, since the motherboards are more common and offer better upgradability. I could only find 1 online store in the UK that sold a tray. Kustom PC’s sold a Lian Li tray for £27 and £7 postage. There was only 1 in stock so I had to buy it.
I also wanted an ATX motherboard which I could mount to the try for testing. I headed over to eBay and found an Asus one for £10 that may or may not have been working.
Monday, 23 January 2012
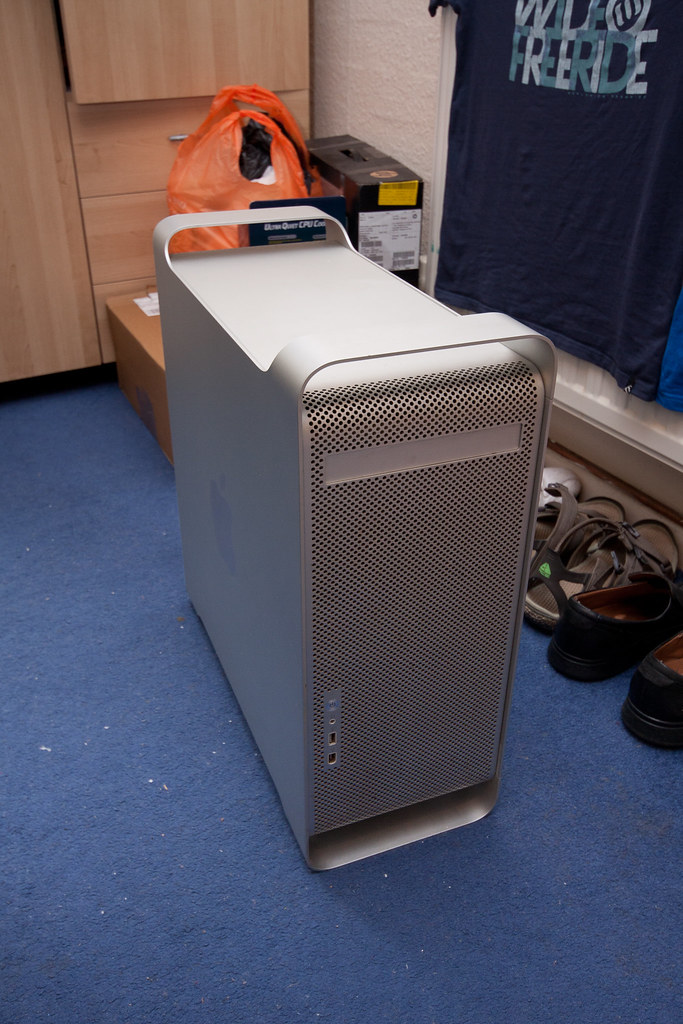
Mac Build 2011- Day 0- Finding a Case
The first task was to find a case. This was quite difficult so I headed over to eBay. Mac Pro cases didn’t really come up at all, but there were a fair few PowerMac’s from a few years ago. Some were being sold complete and working and others for spares and repair. However all I was interested in was the case, and finding one in good condition was tough with the size of eBay photos and whether what the seller thought was good condition, was actually good condition. Postage was another issue. These cases weigh the best part of 20KG and postage costs are quite high. Some people don’t offer to post at all.
After a couple of weeks I found a Buy It Now for a 1.6GHZ single core PowerMac, complete apart from RAM. It was sold for spares as someone poured coffee in it. For £50 this was a steal, postage was £20 but didn’t matter. Others seemed to be selling for £200+.

After a couple of weeks I found a Buy It Now for a 1.6GHZ single core PowerMac, complete apart from RAM. It was sold for spares as someone poured coffee in it. For £50 this was a steal, postage was £20 but didn’t matter. Others seemed to be selling for £200+.
Sunday, 22 January 2012
Mac Build 2011- Introduction
Over the summer I had an internship working at the University of Bristol and so I thought I’d give myself a small project to carry out in my spare time. After looking around on forums and finding it had been done many times before, I thought I’d have a go at converting a PowerMac / Mac Pro case for use with standard ATX parts.
However, from what I had seen of previous conversions, some jobs were pretty messy. My main aim was keeping the case tidy from the outside, with no unnecessary garish screw heads or rivets for example.
Throughout the project I took photos of each stage, which you can find here. I may host these elsewhere if there are issues viewing them.
Each day for the next 15 days I will post the next section of the build, in the order I carried them out in, and I’ll close with some final remarks of the project.
Friday, 6 January 2012
READ International Naked Calendar 2012
After the success of the University of Bristol Netball Club Calendar last year, I was invited to shoot the READ International calendar for 2012. The aim was to raise money for the book charity by selling the calendars to the students of Bristol.
The calendar contains many different societies:
Here is an previously unpublished shot of Computer Science:

More information about the calendar and READ International can be found on the READ Bristol Facebook Group or by emailing bristol@readbookproject.org.uk.
The calendar contains many different societies:
- Men's Hockey
- Law
- Cheerleaders
- ARTofficial
- Computer Science
- Hispanic Society
- Cycling
- Geology and Geoscience
- Banking and Finance
- Mixed Lacrosse
- Chocolate Society
- Massage Society
- Wingardium Leviosoc
- The READ International organisers.
Here is an previously unpublished shot of Computer Science:
More information about the calendar and READ International can be found on the READ Bristol Facebook Group or by emailing bristol@readbookproject.org.uk.
Subscribe to:
Posts (Atom)