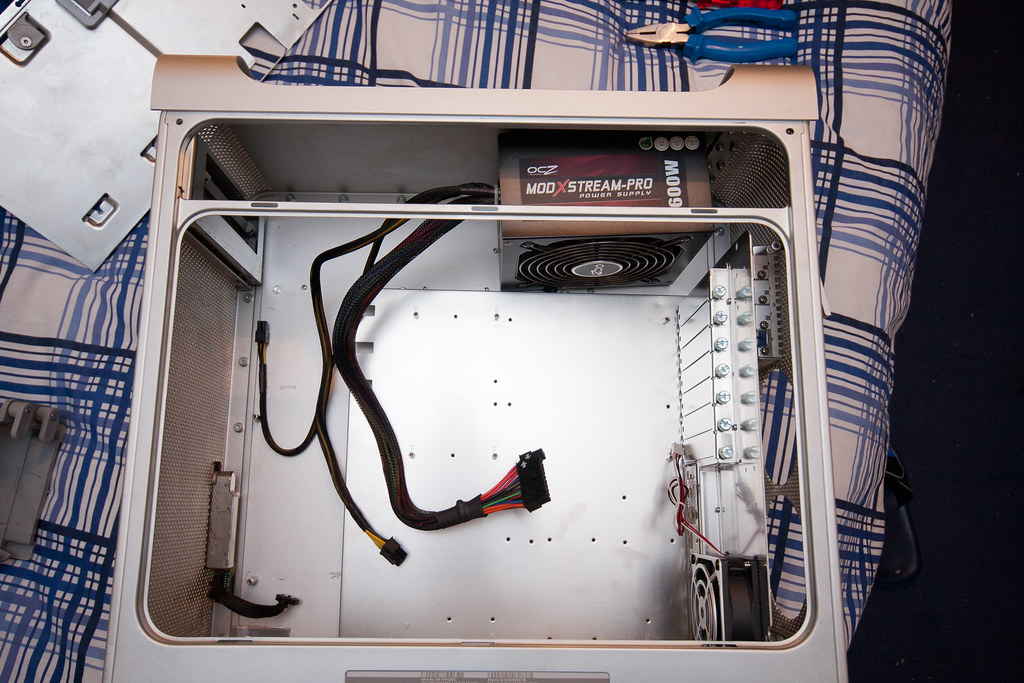
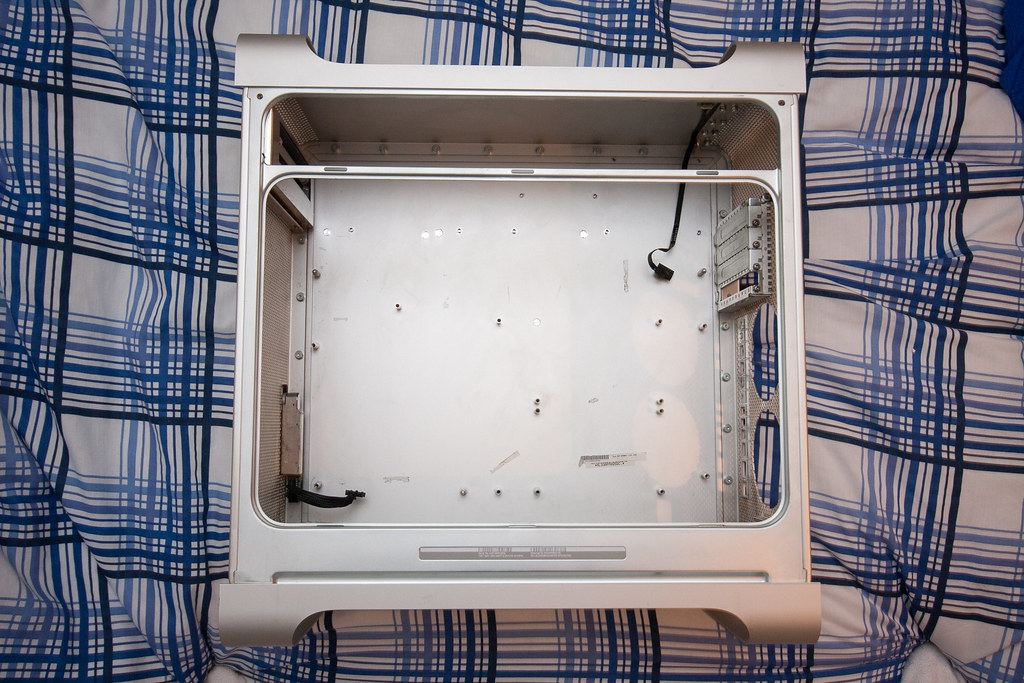
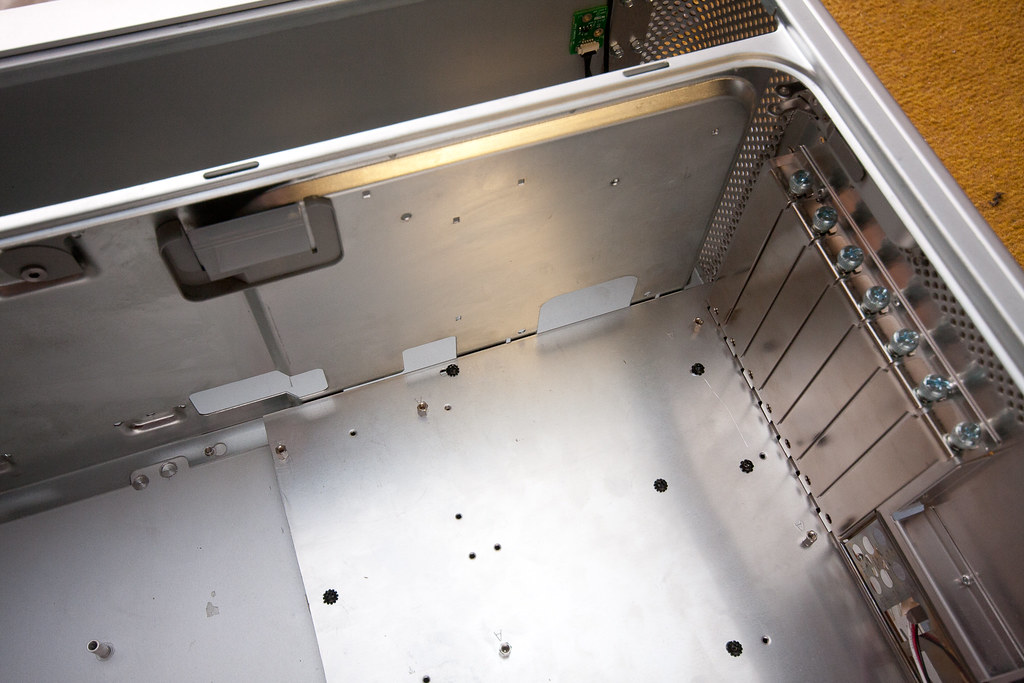
The next task was fixing the motherboard tray in place. From the guides I have seen, many people used JB Weld to fix the old mounting posts into new positions. However this is not available in the UK so I continued without it for now. Note that the motherboard mounting posts of 2 different heights for some reason. I removed all of the taller posts (by gripping them with pliers and with a little force they break away from the case) and left all the shorter ones in place.
The difficulty was working out where I needed to drill the holes through the motherboard tray to line up the mounting posts that were left. To do this I covered the back of the tray in a couple of layers of masking tape, put the tray in position and pressed down where I thought the mounting posts were. This left small rings imprinted in the surface of the tape, so I knew exactly where to drill.
This worked pretty well, only 1 post was horrendously out of position so I had to re-drill this hole. This wasn’t really a problem seeing as the tray would be hidden beneath the motherboard. I managed to use 10 of the existing mounting posts and as it turned out these were quite sturdy and so no screws were required on the back of the tray to hold it to the back of the case. This was a bonus as I really didn’t want the back of the case to look too messy.
Tuesday, 31 January 2012
Monday, 30 January 2012
Mac Build 2011- Day 7- Cutting the Case
Now that the power supply would be above the top shelf and out the way, I could decide where I wanted to mount the motherboard tray. Because the tray I chose was ATX, it was quite tall. So tall in fact that if I mounted it as high as it will go, it only just avoided the start of the curvature of the bottom edge of the case.
After some Photoshop work, the area that needed to be removed from the back of the case was cut and the tray slid in a treat. The corner of the tray was also cut so that the leave to open the case could be accessed. The fit was so good, the top edge of the tray was flush with the top shelf.
Sunday, 29 January 2012
Mac Build 2011- Day 6- Trying different motherboard and PSU positions
The biggest decision in the case mod is deciding where to mount the power supply. There were 3 possibilities I would consider.
Another issue is the size of the motherboard tray. The ATX tray I have is quite wide (from the front to the back of the case) so moving it up or down may not be that easy if it hits the optical drive for example.
In the end I decided I would mount the power supply in the top as it seemed the best use of space, leaving a large space in the case for hard drives.
At some point I got the motherboard tray cut. There were a good 5cm after the last set of holes I needed to mount it to the case and removing this area would mean I could possibly mount the motherboard tray up high in the case and not hit the optical drive. I got this cut courtesy of the main workshop in the Queen’s Building of the Faculty of Engineering.
- Mounting the PSU in the top- the issue here is if there’s enough height between the shelf and the top of the case and finding a new home for the hard drives.
- Mounting it in the bottom at the front- this would require making some kind of mount / way of attaching it to the bottom of the case since there are only 4 holes in the bottom of the case. I would also need to make a cable to reach from the power plug in the back of the case to the power supply itself.
- Removing the PSU from the case and putting it inside the Mac PSU case- this seemed to be a tidy solution, albeit the most dangerous. As soon as you open up the case of your PSU the warranty is void and so I didn’t want to do this and the find out it wouldn’t fit inside the Mac PSU case. I could then reuse the existing Mac plug connector on the back of the case.
Another issue is the size of the motherboard tray. The ATX tray I have is quite wide (from the front to the back of the case) so moving it up or down may not be that easy if it hits the optical drive for example.
In the end I decided I would mount the power supply in the top as it seemed the best use of space, leaving a large space in the case for hard drives.
At some point I got the motherboard tray cut. There were a good 5cm after the last set of holes I needed to mount it to the case and removing this area would mean I could possibly mount the motherboard tray up high in the case and not hit the optical drive. I got this cut courtesy of the main workshop in the Queen’s Building of the Faculty of Engineering.
Saturday, 28 January 2012
Mac Build 2011- Day 5- Cleaning the PSU
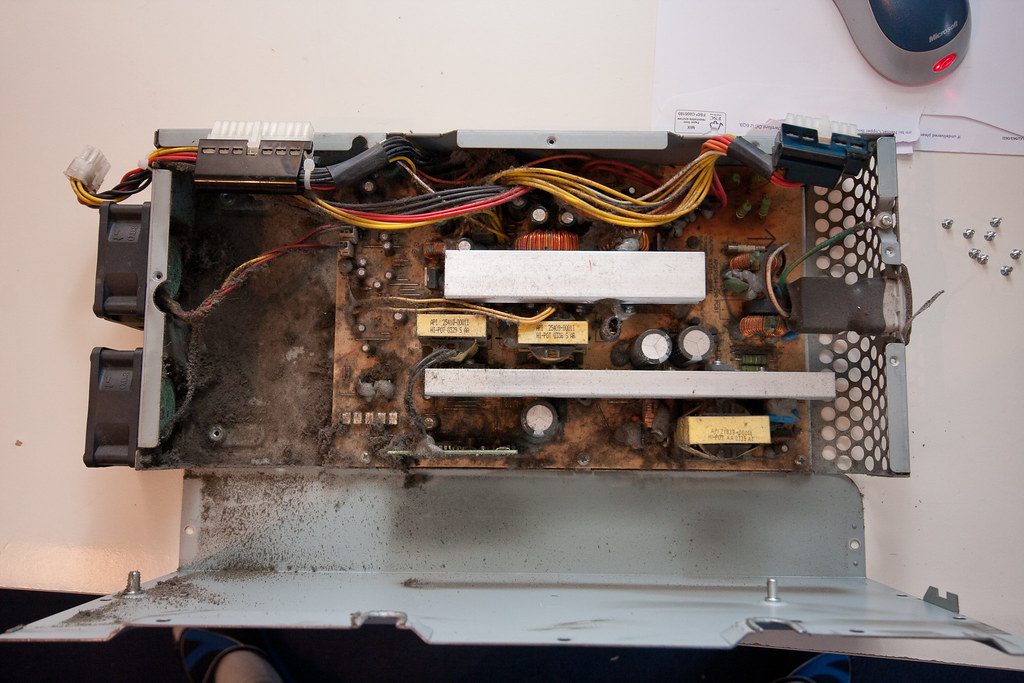
This was the first time I’ve had a look inside a computer PSU so didn’t really know what to expect. What I found was tonnes and tonnes of dust. On the front of the case were 2 small fans that suck air through the PSU and out the back of the case. However there isn’t a filter on the front and the fans are right at the bottom of the case, so a fair amount of dust from the floor is sucked in.
After sticking a hoover through it and removing the circuit board, and could have a guess at whether the PSU I had would fit in this case.
Friday, 27 January 2012
Mac Build 2011- Day 4- Cleaning the Case
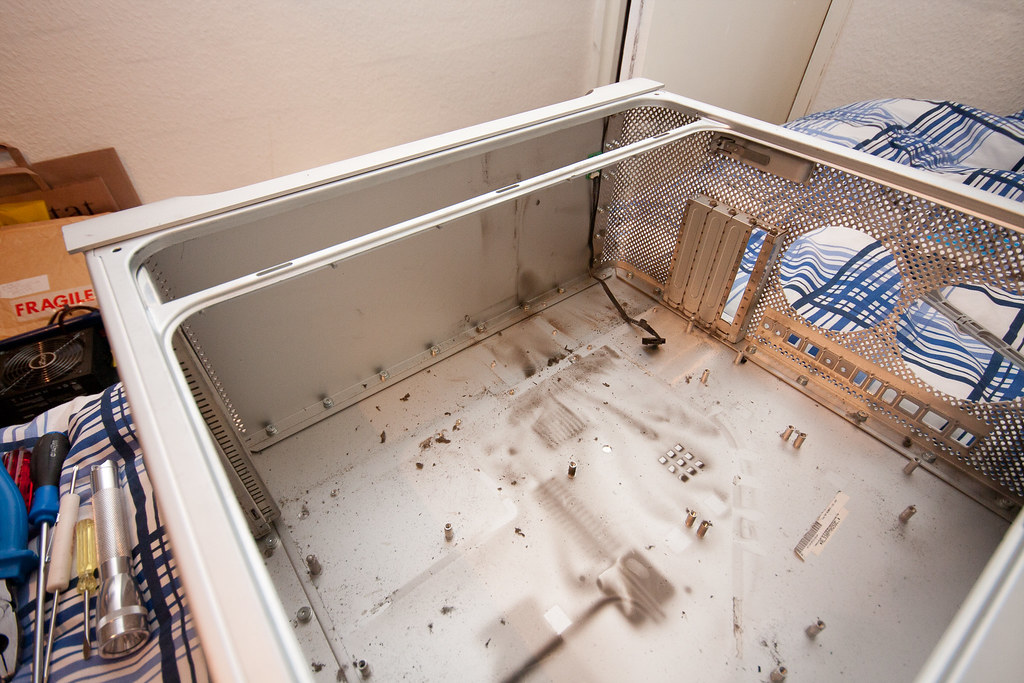
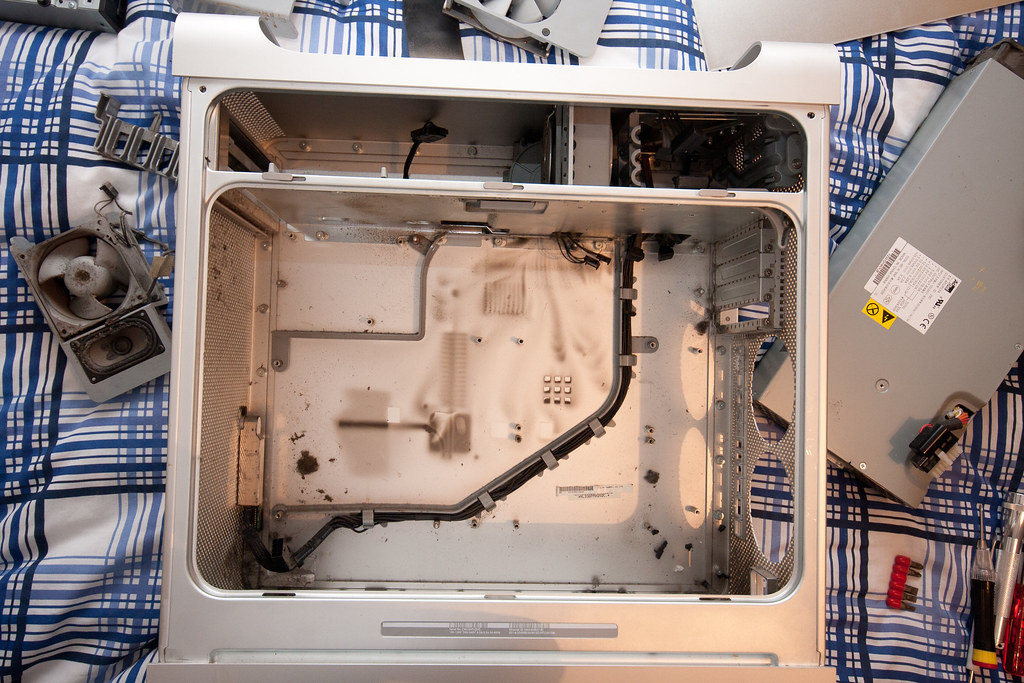
There was quite a lot of dust in the case. Some of which has dried on due to the coffee spillage. After a hoover and a spray of some metal cleaner, the inside of the case was shiny again and looked new. You can now see the motherboard mounting posts which I tried to reuse.
Thursday, 26 January 2012
Mac Build 2011- Day 3- Stripping the Case 2
After a trip to Toolstation for a long handled screwdriver I could remove the hard drive cage and fan. However the cage was too large to slide out the side of the case, so next up was removing the top shelf that supports the hard drive cage and optical drive.
The shelf was held in neatly, however it also contained the lock for the side panel which tricky to remove and felt quite flimsy. Care had to be taken not to snap it. Once this was out the shelf rotated out and out came the hard drive cage.
All that was left to remove were the cables that were clipped down diagonally across the back of the case which were held in place with double sided tape.
The shelf was held in neatly, however it also contained the lock for the side panel which tricky to remove and felt quite flimsy. Care had to be taken not to snap it. Once this was out the shelf rotated out and out came the hard drive cage.
All that was left to remove were the cables that were clipped down diagonally across the back of the case which were held in place with double sided tape.
Wednesday, 25 January 2012
Mac Build 2011- Day 2- Stripping the Case
The first challenge was removing all the Apple parts in the case. Some parts were held in in very weird and peculiar ways. All the screws were different for each component, which made it a pain to remove some parts. Most screw heads were Phillips, but some had Hex and Torx heads which luckily and I had the right size screw bits.
The first parts to come out were the CPU heatsink and fan. The heatsink was heavy and absolutely massive. I could now see all the screws holding the motherboard in place. There were a few cables to disconnect for the power, front IO, fans and hard drives, once these were removed the motherboard lifted out relatively easily.
I could now access the power supply in the bottom of the case. Again this was relatively easy to remove as it was only held in by a few of screws, however there are 4 to remove from the underside of the case. The Mac PSU is strange in that it covers the whole bottom of the case, but in doing so it is relatively thin.
I then hit a problem in that I couldn’t reach some screws that held the hard drive cage in place.
The first parts to come out were the CPU heatsink and fan. The heatsink was heavy and absolutely massive. I could now see all the screws holding the motherboard in place. There were a few cables to disconnect for the power, front IO, fans and hard drives, once these were removed the motherboard lifted out relatively easily.
I could now access the power supply in the bottom of the case. Again this was relatively easy to remove as it was only held in by a few of screws, however there are 4 to remove from the underside of the case. The Mac PSU is strange in that it covers the whole bottom of the case, but in doing so it is relatively thin.
I then hit a problem in that I couldn’t reach some screws that held the hard drive cage in place.
Subscribe to:
Posts (Atom)